Setting up webdav+https 3/3: client side on Windows 7
This howto is for setting up a webdav-over-https client on Windows 7. See the other posts in this series to set up the server or the Debian client.
Make sure the client knows how to associate the Fully Qualified Name (FQN) for your server (in this example secure.example.com) to your public IP address (in this example 2.2.2.2). If that is not available through your DNS, add this line to the bottom of C:\WINDOWS\system32\drivers\etc\hosts:
2.2.2.2 secure.example.com
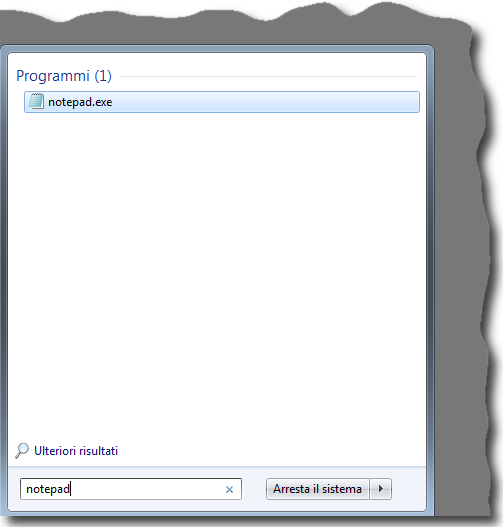
To do that you need to start notepad as admin:
- Click on the start button
- Type “notepad”
- Move the selection with the keyboard arrows on “Notepad”
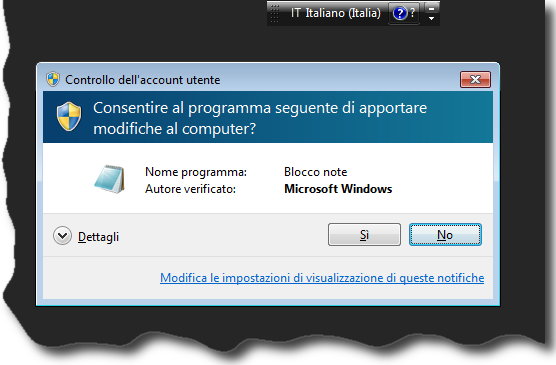
 Launch it with the key combination CTRL+SHIFT+ENTER
 - You will be asked to confirm that Notepad should be launched with elevated privileges:
Once notepad is open in administrative mode, browse to C:\WINDOWS\system32\drivers\etc, change the file type filter to”All files (*.*)” and load the hosts file. Add the line above, save and exit.
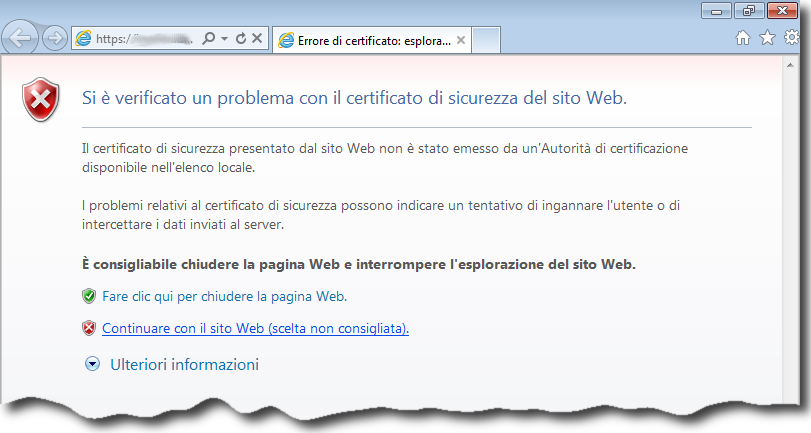
If you visit https://secure.example.com with Internet Explorer at this time, you should see your https server welcome message:
 but to get there you need to temporarily accept the invalid site certificate by clicking on the link “Continue with the web site”:
 To get rid once and for all of the “invalid certificate” errors we’ll install the certificate:
- Start Internet Explorer as admin, for example by performing a right-mouse-button-click on the Internet Explorer link in the Start menu:
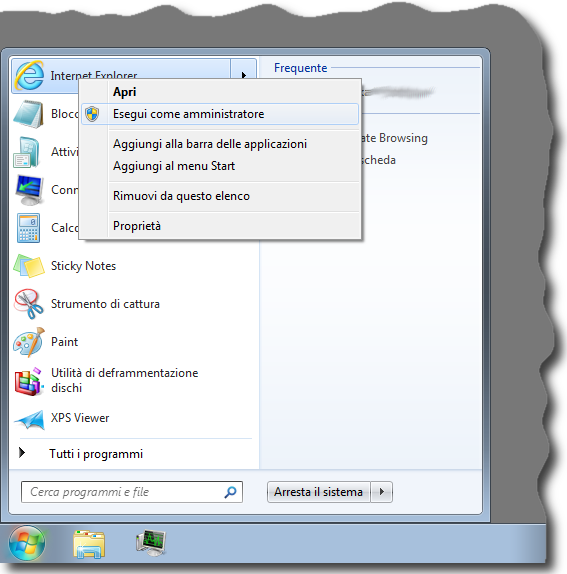 and selecting “Start as administrator”
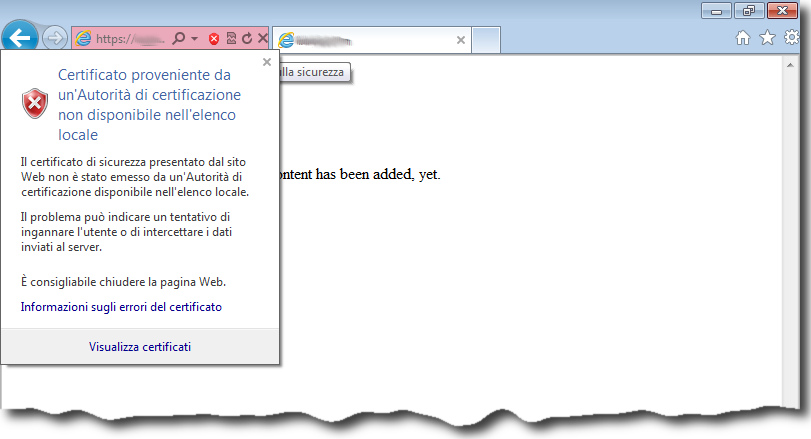
 - Visit https://secure.example.com, and temporarily accept the invalid certificate again
- Perform a single click on the red “invalid certificate” icon:
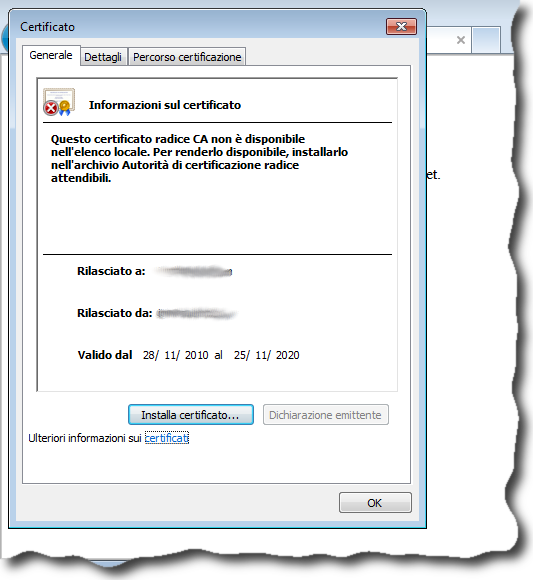
 then click on “Show certificates”
 - Now click on “Install the certificate” button:
 follow the wizard and manually secelct as “destination store” the “Root certificate Authorities”
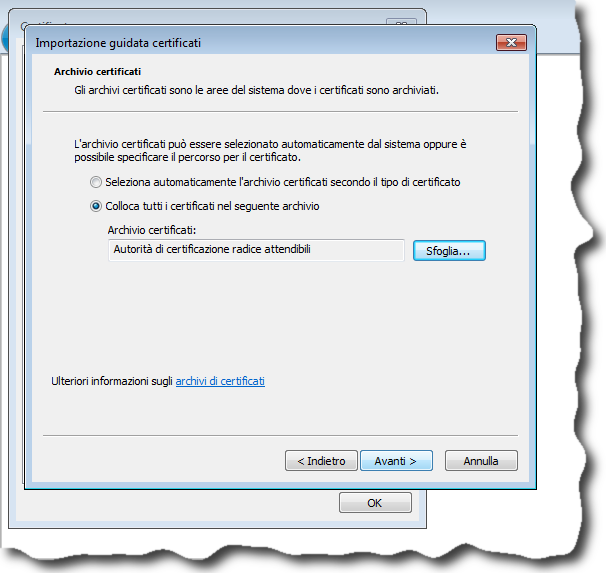
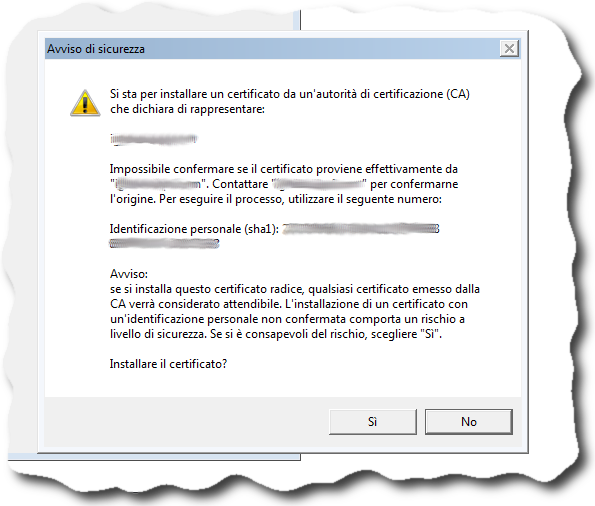
- Confirm that you really want to install the certificate:
- Close the Internet Explorer instance running in administrator mode
- Reopen Internet Explorer as a plain user.
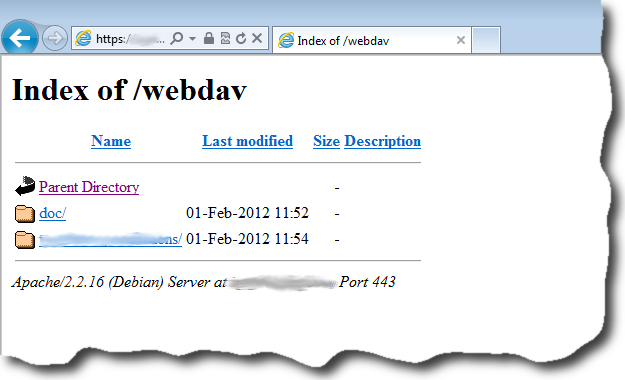
Now you should also be able to access without any certificate warning the webdav share in read-only mode at the address https://secure.example.com/webdav/, if you provide your username / password to the browser: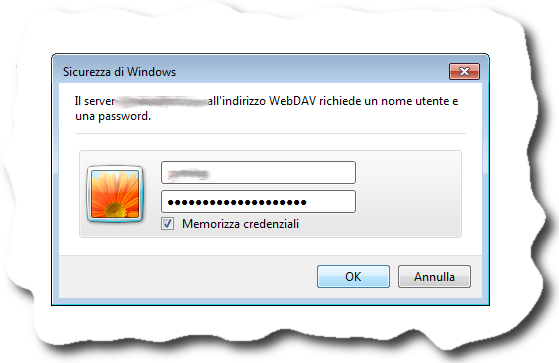
 To gain write access on Windows 7 we need to access the webdav share via the WebDAV Mini Redirector:
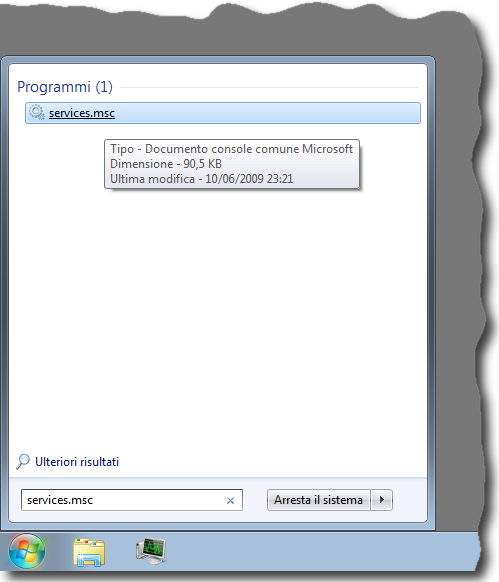
- Make sure the WebClient service is started and automatic:
type “services.msc” into the search box in the start menu and hit enter.
 Scroll down the WebClient and check it is started and automatic:
 If its not, perform a right-mouse-button click on it and make sure the properties page looks like this:
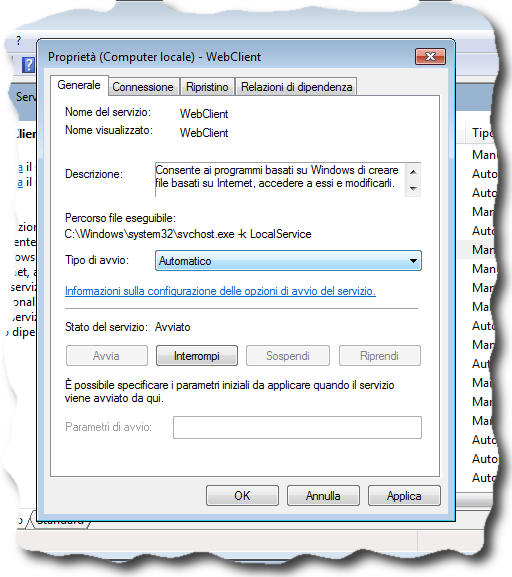
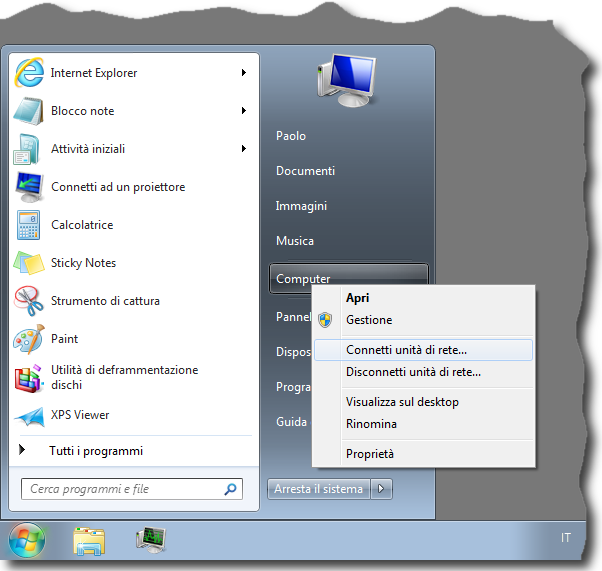
- Right click on My Computer and select Map Network Drive:
- In the Folder “entry field”, enter this URL: \secure.example.com@SSL\DavWWWRoot\webdav
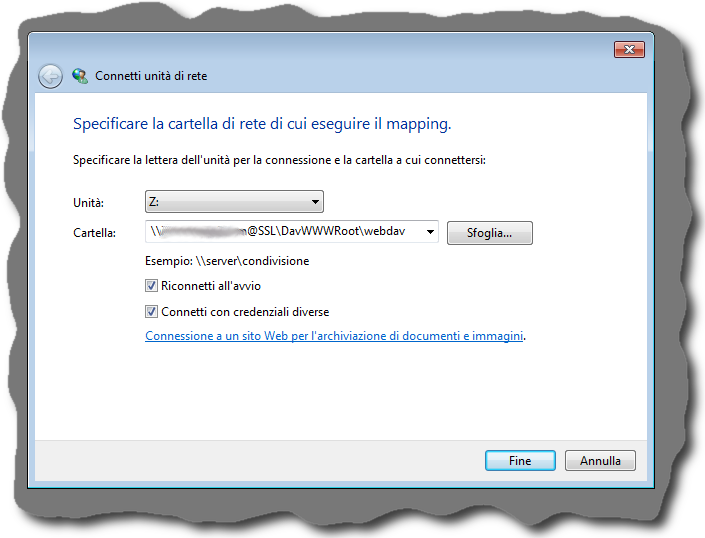 then make sure the check box “Log in with different credentials” is ticked and click Finish.
 - Enter your username and password in the authentication box that appears (save login data to save the inconvenience of retyping it in the future):

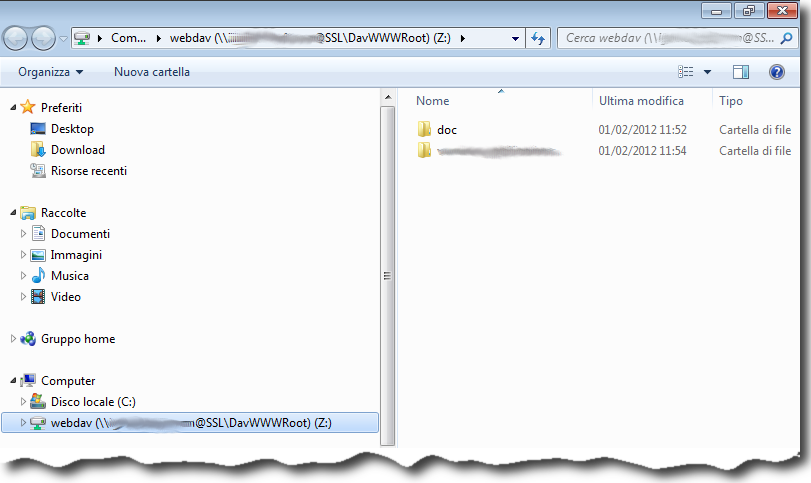
That should be it ! You will now be able to browse the remote files and folders transparently via Windows Explorer:
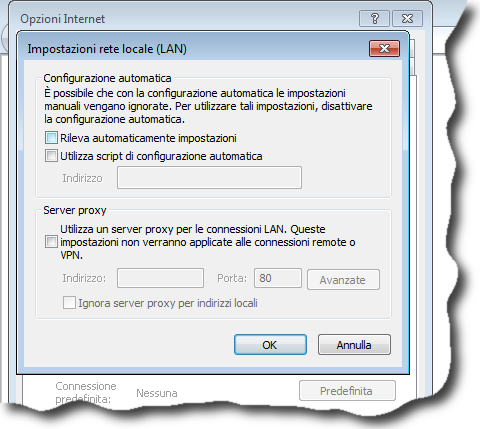
Note: Some people report slow performance of the webdav ; apparently changing the following setting has a positive effect:
- In Internet Explorer, open the Tools menu (press once alt to make the menu bar visible)
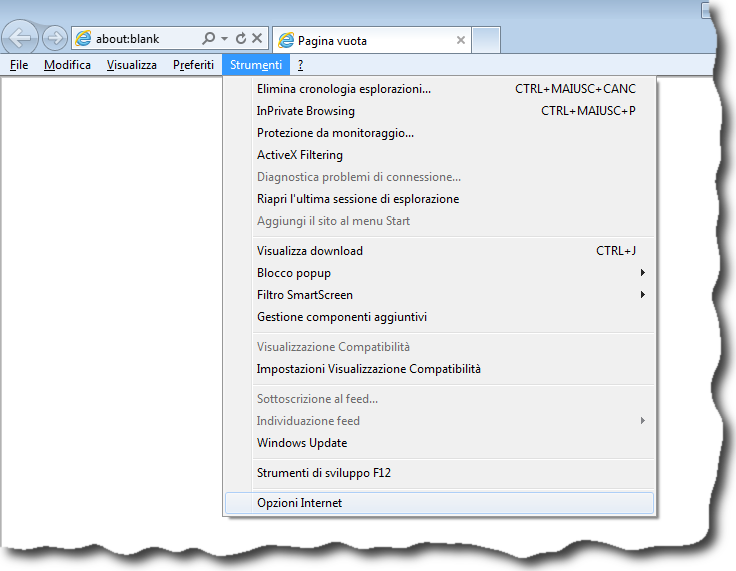
- Then click Internet Options and select the Connections tab;
- Click the LAN Settings button and uncheck the “Automatically detect settings” box: